- You can find the views page on the left navigation for each workspace, if you have permissions.

- Click on “Create View”. First, give the view a name and select which department(s) you wish to filter by. You can type the department name in the text box, or click on the up/down arrows inside text box. Next, filter which time metric you wish to query for.
greater than and the number 0 to display all active users. Any user who has not played in your game(s) will not show in this view.

- Now create view when you are finished. You can always edit this view later.
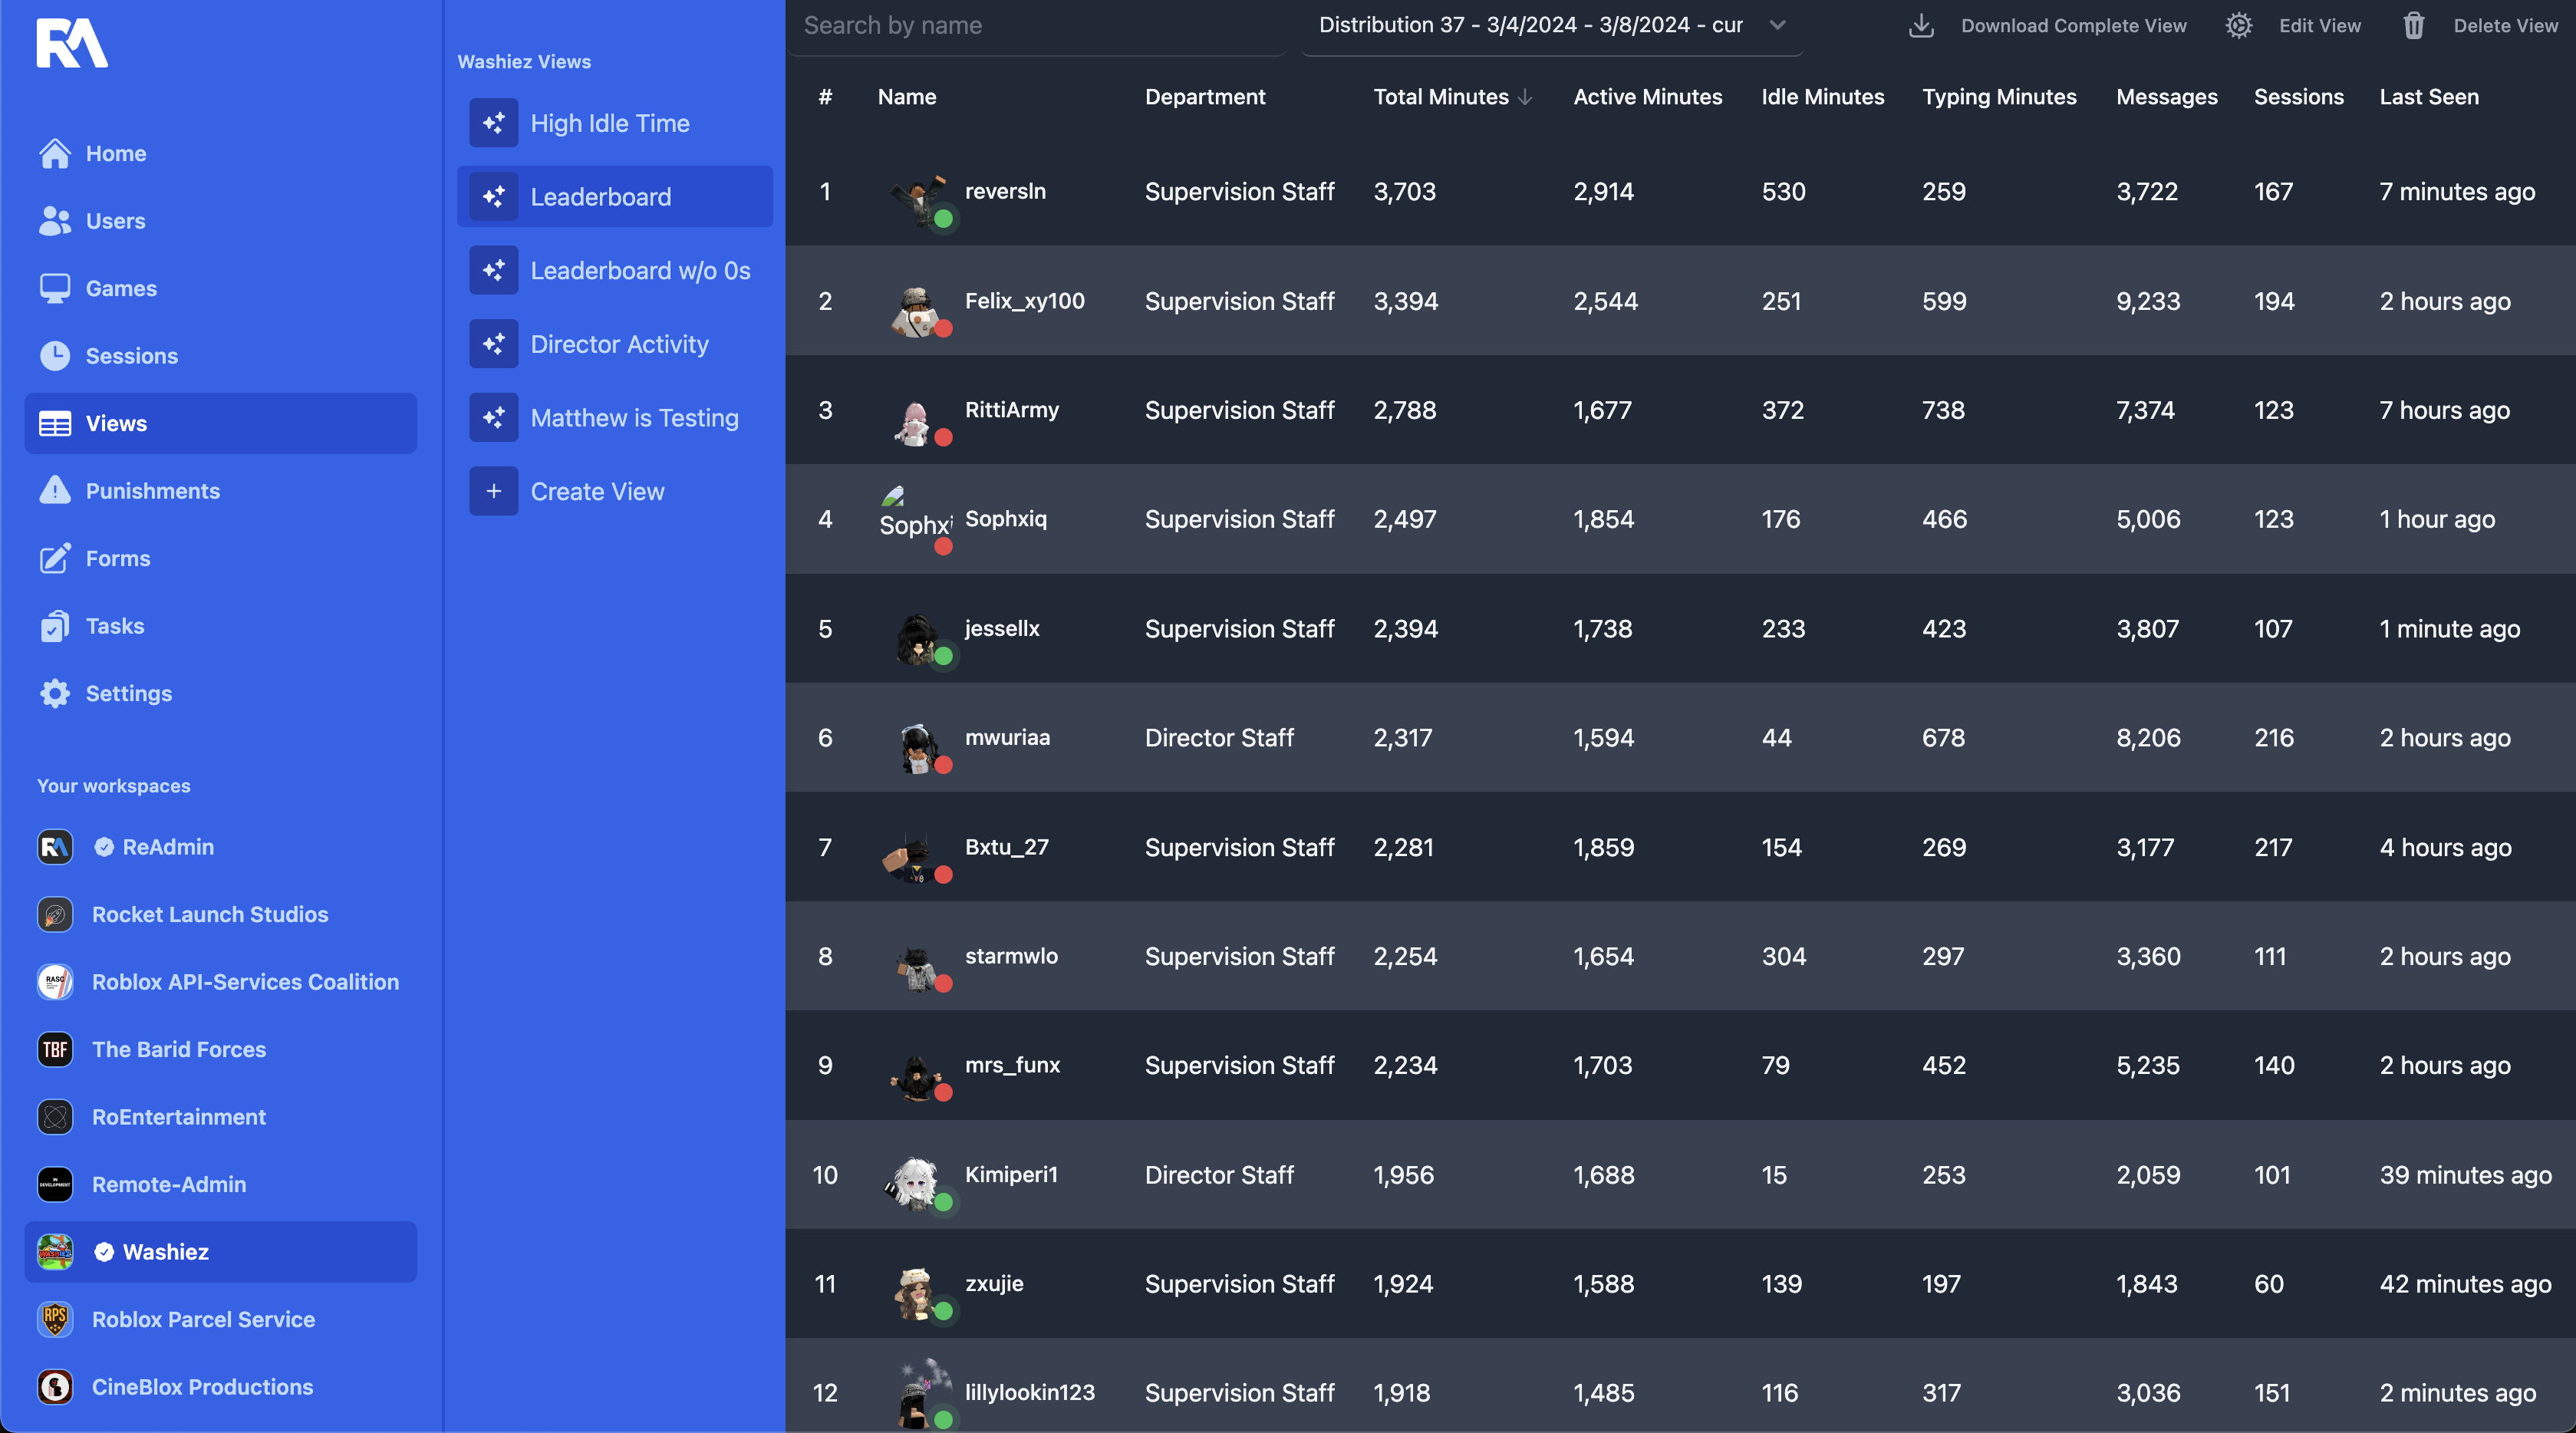
0 total minutes in our game(s). We chose to sort users by total minutes, from highest (top) to lowest (bottom), in descending order selected in the sort filter.
Filters Explained
Total Minutes: includes all time spent in game. This also includes time the user spent typing or was idle. Active Minutes: includes all time the user spent in game; does not include Idle time. Typing Minutes: includes all time the user spent typing in Roblox game chat. Idle Minutes: includes all time the user spent not actively playing on Roblox (like if the user does not move in-game). Total Messages: includes the total number of messages sent in the Roblox game chat. Total Sessions Attended: includes the total number of sessions the user was recorded for attending.Filter Operators Explained
Less than: allows you to filter for a number that is less than your input. So if this option is selected for total messages, and if you enter the number 5, you can view the number of users who sent less than 5 messages in game. You will see users who have sent 1 thru 4 messages in game. Less than or equal to: allows you to filter for a number that is less than or equal to your input. So if this option is selected for total messages, and if you enter the number 5, you can view the users who sent less than or exactly 5 messages in game. You will see users who have sent 1 thru 5 messages in game. Greater than: allows you to filter for a number greater than your input. So if this option is selected for total messages, and if you enter the number 5, you can view the users who sent more than 5 messages in game. You will see users who have sent 6 messages or more in game. Greater than or equal to: allows you to filter for a number greater than or equal to your input. So if this option is selected for total messages, and if you enter the number 5, you can view the users who sent more than 5 messages in game. You will see users who have sent 5 messages or more in game. Equal to: allows you to filter for a number equal to your input. So if this option is selected for total messages, and if you enter the number 5, you can view the users who sent exactly 5 messages in game. Not equal to: allows you to filter for a number not equal to your input. So if this option is selected for total messages, and if you enter the number 1, you will view only users who have not sent exactly 1 message in game. You will see users with 0 messages, even 2 or more messages; but you will not see anyone who sent just 1 message.Sort Filters Explained
If your data is not organized from the highest to lowest totals, you will have to set one of the following sort options.
Tips and Tricks on the Views page
- Left clicking on the user from the views page will open a new tab, this will bring you to their activity summary on ReAdmin.
- Right clicking on the user from the views page will also allow you to add user tags. User tags can be created from the workspace settings page by workspace admins. Currently, user tags are only accesible on the views feature. Tags can be named, and can have different colors.
- Users will have a green or red dot next to their profile picture. Green indicates the user is currently in a game listed under your workspace. Red indicates the user is not active in a game listed under your workspace.
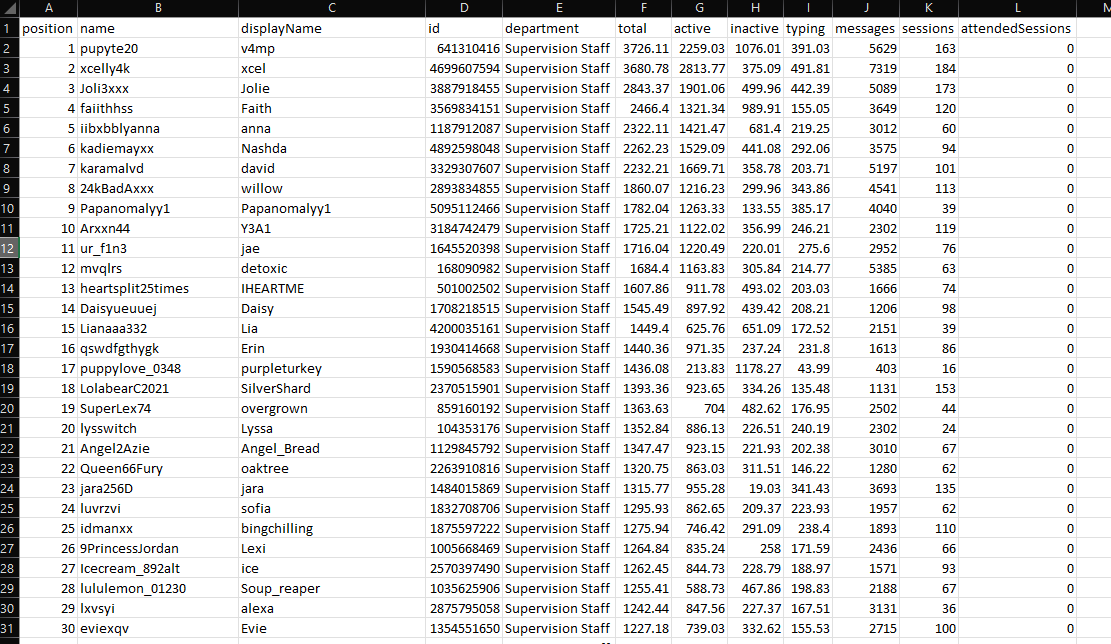
- Workspaces can now export/download data in JSON format, or even create Excel documents.