> ## Documentation Index
> Fetch the complete documentation index at: https://docs.readmin.app/llms.txt
> Use this file to discover all available pages before exploring further.
# Teams
> Enable Teams, build the approval chains for time-off and expense requests, and control who can submit expenses.
Looking for how the feature works day-to-day? See the
[Teams feature guide](/features/teams).
Teams settings let a workspace admin turn the Teams system on, decide how time-off
and expense requests are routed for approval, and control who can submit expenses.
Only workspace **admins** can change these settings.
 ## Enable Teams
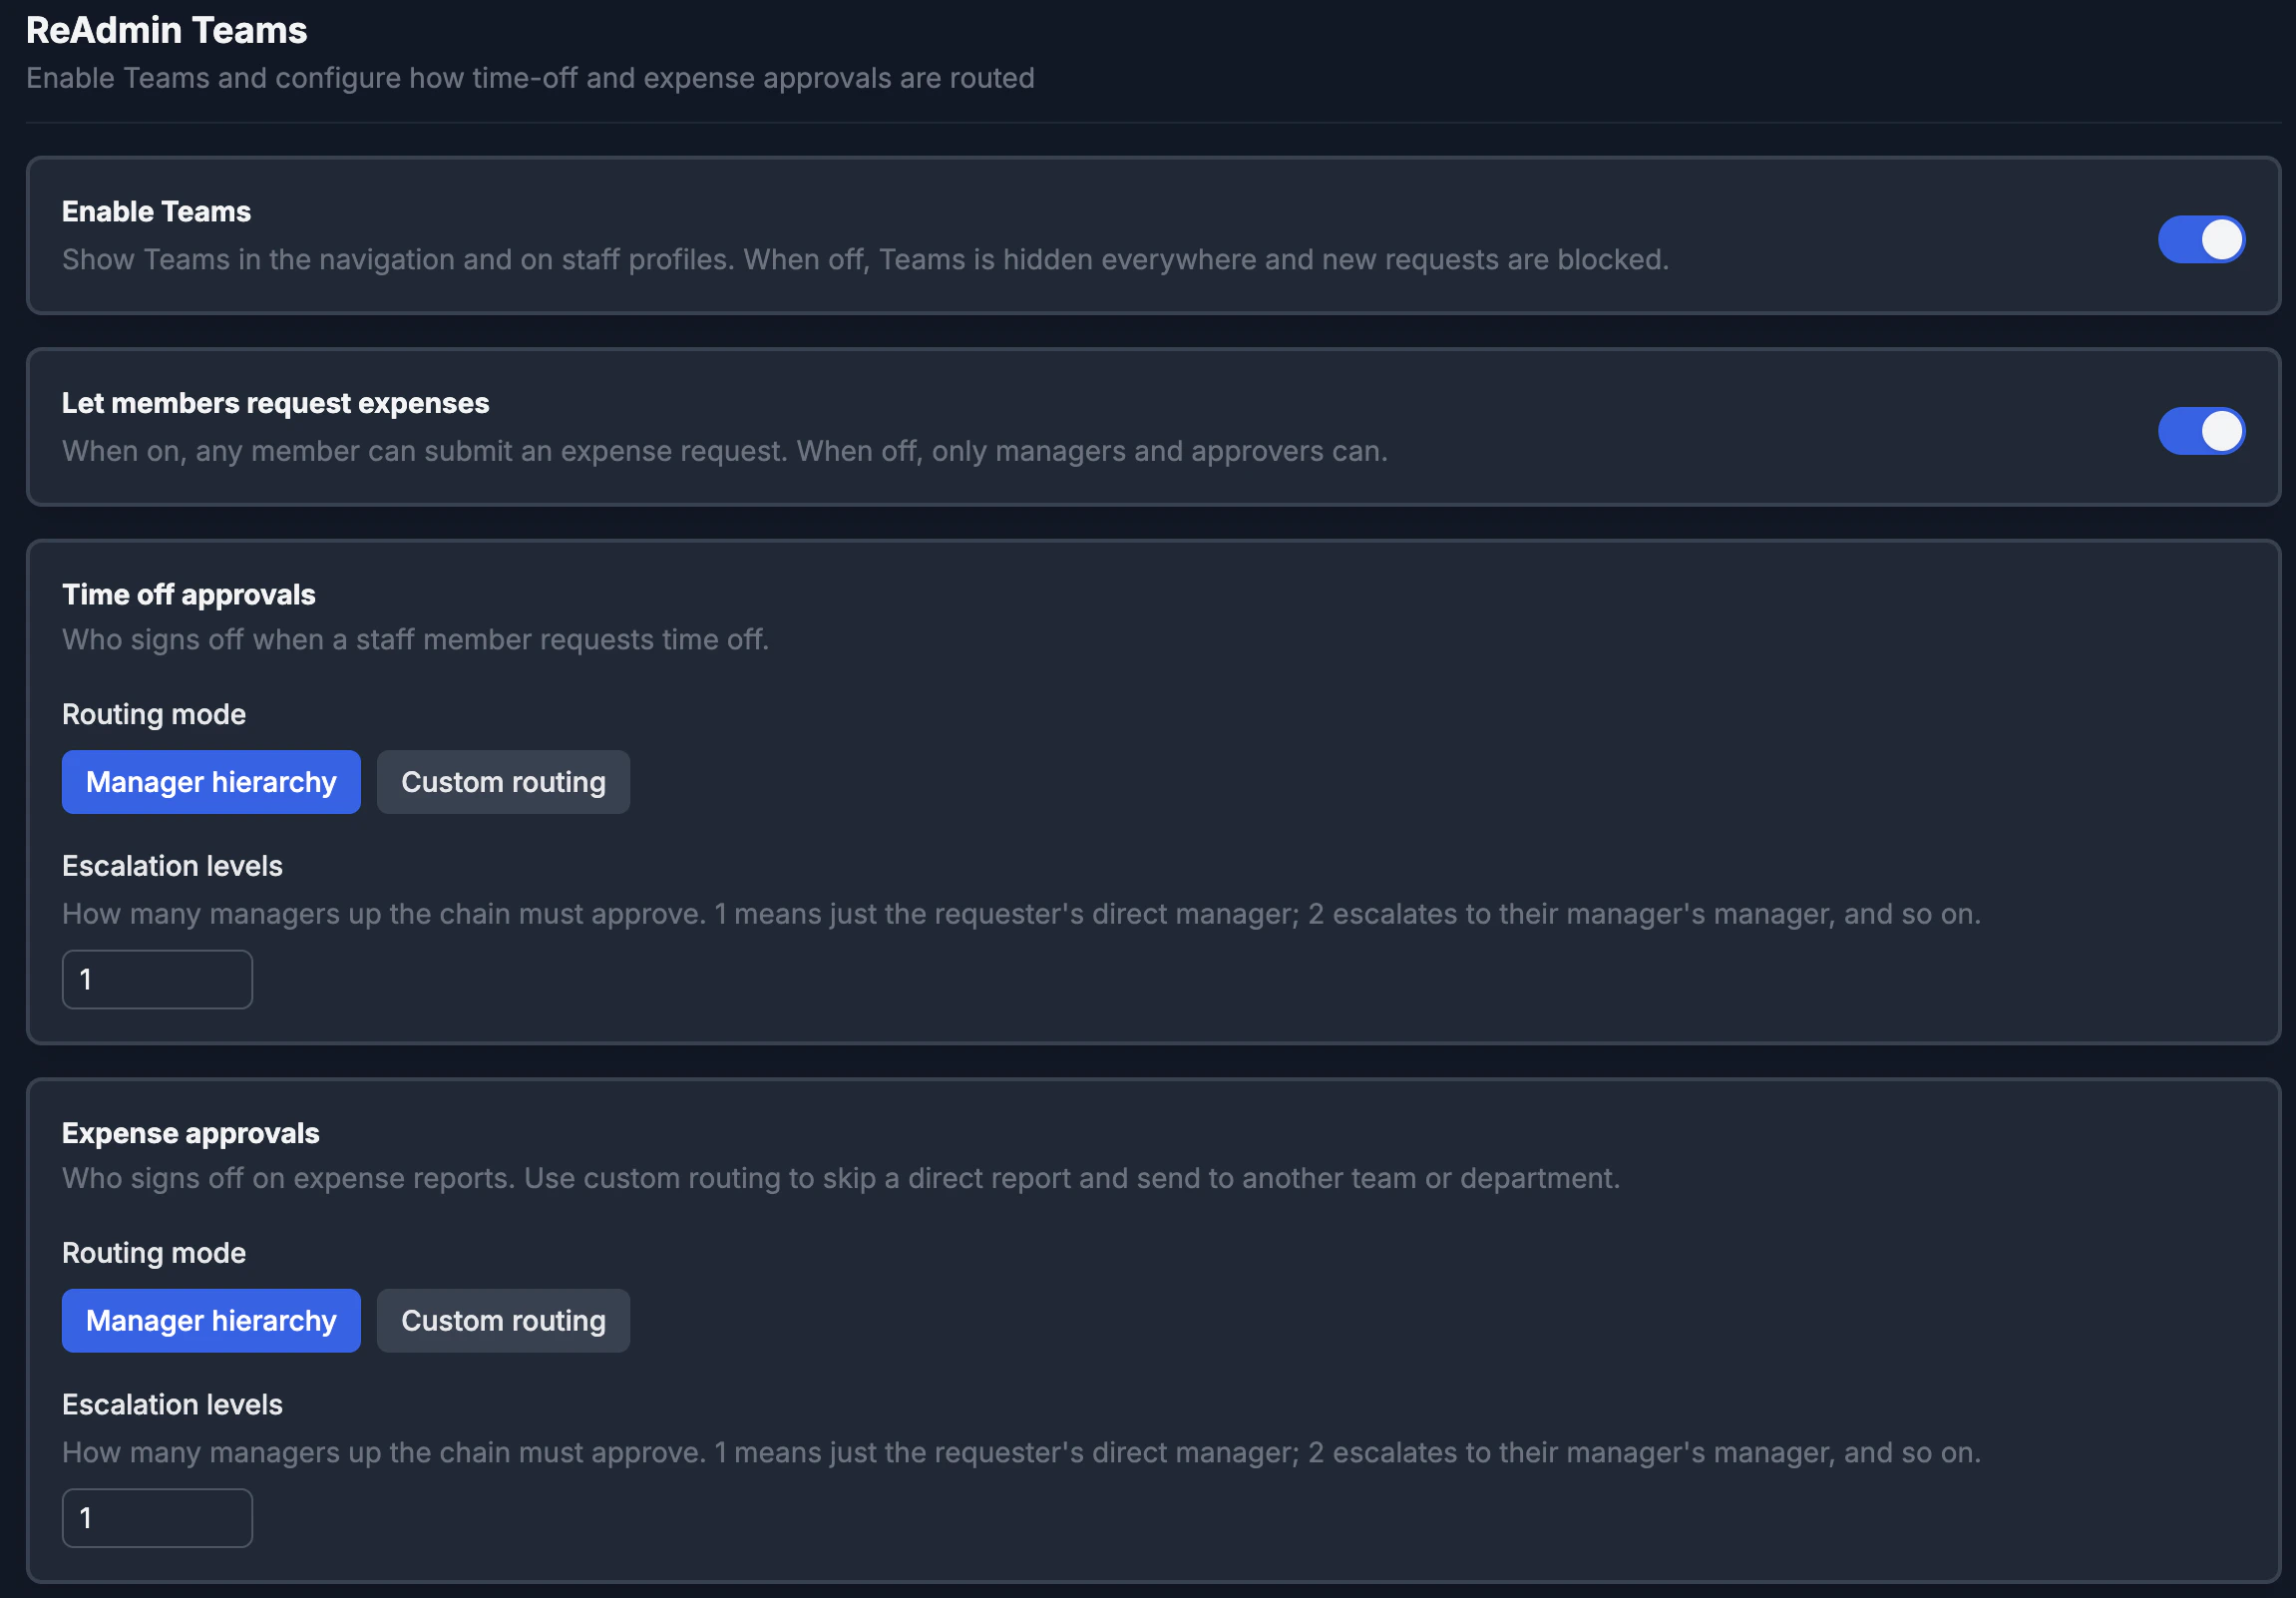
The **Enable Teams** toggle is the master switch. While it is off, the Teams
navigation, the request queues, and the Teams panel on staff profiles are all
hidden, and new requests are blocked. Turn it on to make the feature available
across your workspace.
## Let members request expenses
By default, any member can submit an expense request. Turn **Let members request
expenses** off to limit submissions to managers and approvers — when it's off,
regular members no longer see the **Request Expense** button and the server
rejects member expense submissions. Time-off requests are always available to
everyone.
## Approval chains
Time off and expenses each have their **own** approval chain, so you can route
them completely differently. For each one, pick a routing mode:
### Manager hierarchy
The request walks up the requester's manager chain a set number of levels. Set
**Escalation levels** to control how far:
* **1** — only the requester's direct manager approves.
* **2** — escalates to their manager's manager after the first approval.
* …and so on, up the chain.
This preserves simple single-step approval when you set it to 1.
### Custom routing
Build an ordered list of steps that are approved one at a time. Use the **Add
step** button, reorder with the arrows, and remove steps you don't need. Each step
has a type:
| Step type | Approved by | Use it to… |
| ---------------------- | ------------------------------------------- | -------------------------------------------------------------------------------------------- |
| **Manager (by level)** | The requester's manager at the chosen level | Walk up the reporting chain a specific number of steps. |
| **Team leads** | The leads of a team you pick | Hand a request to a whole team — e.g. send expenses to a Finance team in another department. |
| **Specific person** | One person by their Roblox user ID | Always route a step to a named approver. |
Every step also takes an optional **label** (for example, "Finance review") that
shows up on the request's approval bar so everyone can see what each step is for.
Custom routing is how you **skip a direct report**. Add a **Team leads** or
**Specific person** step to send an expense report straight to finance instead
of walking it up the requester's own manager chain.
## Saving
Click **Save Settings** to apply your changes. Updates take effect immediately for
new requests; requests already in flight keep the chain they were created with.
Empty or unset chains fall back to a single admin-approval step, so requests are
never left without an approver.
## Related pages
* [Teams feature guide](/features/teams)
* [Departments](/settings/departments)
* [Time Off](/features/time-off)
## Enable Teams
The **Enable Teams** toggle is the master switch. While it is off, the Teams
navigation, the request queues, and the Teams panel on staff profiles are all
hidden, and new requests are blocked. Turn it on to make the feature available
across your workspace.
## Let members request expenses
By default, any member can submit an expense request. Turn **Let members request
expenses** off to limit submissions to managers and approvers — when it's off,
regular members no longer see the **Request Expense** button and the server
rejects member expense submissions. Time-off requests are always available to
everyone.
## Approval chains
Time off and expenses each have their **own** approval chain, so you can route
them completely differently. For each one, pick a routing mode:
### Manager hierarchy
The request walks up the requester's manager chain a set number of levels. Set
**Escalation levels** to control how far:
* **1** — only the requester's direct manager approves.
* **2** — escalates to their manager's manager after the first approval.
* …and so on, up the chain.
This preserves simple single-step approval when you set it to 1.
### Custom routing
Build an ordered list of steps that are approved one at a time. Use the **Add
step** button, reorder with the arrows, and remove steps you don't need. Each step
has a type:
| Step type | Approved by | Use it to… |
| ---------------------- | ------------------------------------------- | -------------------------------------------------------------------------------------------- |
| **Manager (by level)** | The requester's manager at the chosen level | Walk up the reporting chain a specific number of steps. |
| **Team leads** | The leads of a team you pick | Hand a request to a whole team — e.g. send expenses to a Finance team in another department. |
| **Specific person** | One person by their Roblox user ID | Always route a step to a named approver. |
Every step also takes an optional **label** (for example, "Finance review") that
shows up on the request's approval bar so everyone can see what each step is for.
Custom routing is how you **skip a direct report**. Add a **Team leads** or
**Specific person** step to send an expense report straight to finance instead
of walking it up the requester's own manager chain.
## Saving
Click **Save Settings** to apply your changes. Updates take effect immediately for
new requests; requests already in flight keep the chain they were created with.
Empty or unset chains fall back to a single admin-approval step, so requests are
never left without an approver.
## Related pages
* [Teams feature guide](/features/teams)
* [Departments](/settings/departments)
* [Time Off](/features/time-off)